
Overview
Outlook is Microsoft’s email software for Windows and the Office suite. This walk through will show you how to configure Outlook to work with your email address.
Before you start
If you haven’t already, you will want to create an email address with your email hosting account. You can find information on that process here.
You will first need to ensure you have the correct password for the account. You can test this by trying to log into your webmail.
If you do not know your hosting service password, you can log into your hosting service and update it there.
Setting up a new account
To add your email address to Outlook, you will need to click on File in the upper left hand side.
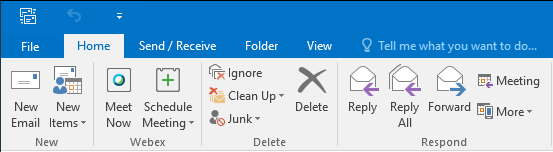
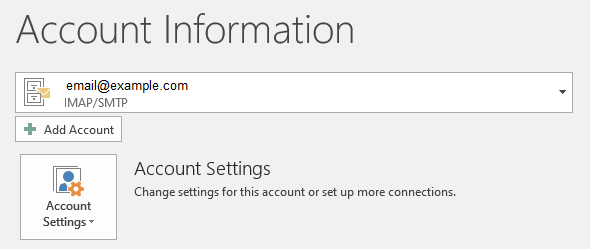
Next, you will want to click on Add Account
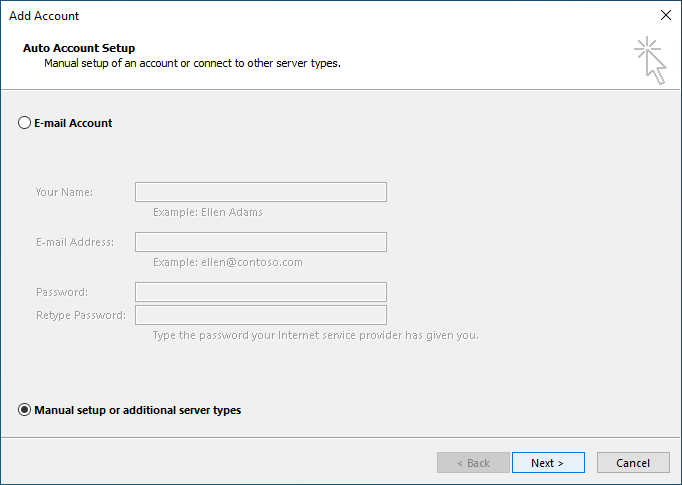
On older versions of Outlook, you should now see a screen that looks like this.
Note: If you are not seeing this screen, you have an newer version of office. Please follow the guide found here.
Click on the ‘Manual setup‘ option an click Next.
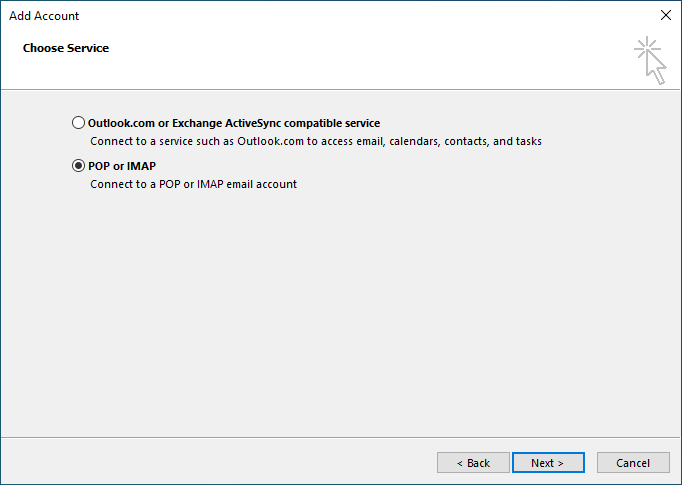
You will now need to choose your service type.
Choose POP or IMAP and click Next.
You can find information on the differences between these protocols here.
You should now be able to enter your email settings.
User Information
- Your Name: this is what is displayed on sent messages
- Email Address: your email
Server Information
- Account Type: choose between POP and IMAP (you can find information on the differences between POP and IMAP here).
- Incoming Mail Server: mail.example.com (replace example.com with your domain)
- Outgoing Mail Server (SMTP): mail.example.com (replace example.com with your domain)
Login Information
- User Name: this is your email address
- Password: your email password
‘Require log on using Secure Password Authentication (SPA)’ should not be checked.
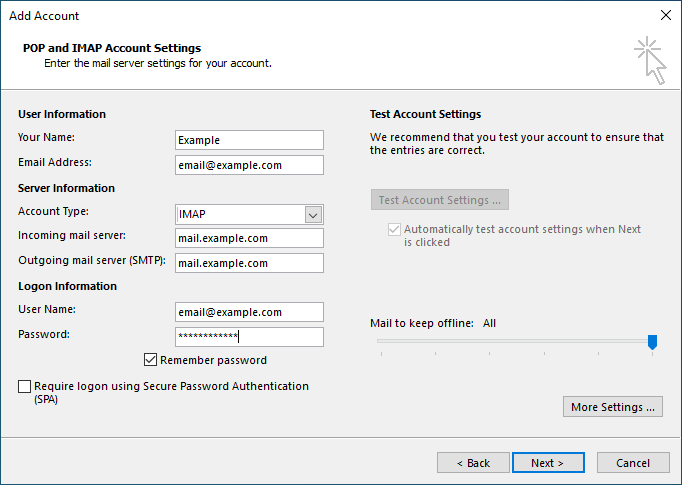
Before you click next, click on More Options …
Once the window loads, click on the Outgoing Server tab.
Make sure that ‘My outgoing server (SMTP) requires authentication’ is checked and that ”Use same settings as my incoming mail server.
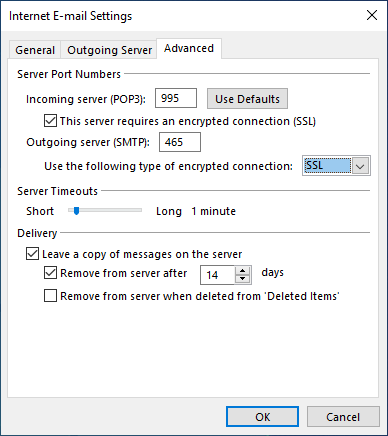
Now click on the the Advanced tab. This tab will be slightly different depending on if you are using POP or IMAP.

POP
You only need to worry about the Server Port Numbers section.
- Incoming server (POP3): 995
- The checkbox that states ‘This server requires an encrypted connection’ should be checked.
- Outgoing server (SMTP): 465
- Use the following type of encrypted connection: choose SSL from the drop down.
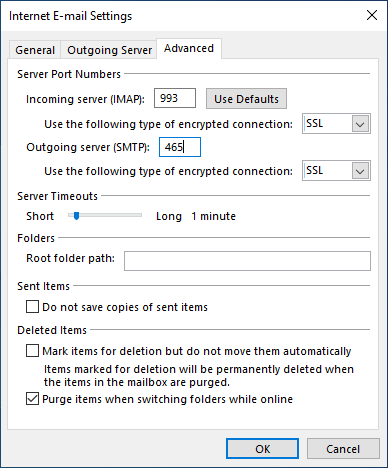
IMAP
You only need to worry about the Server Port Numbers section.
- Incoming server (IMAP): 993
- Use the following type of encrypted connection: choose SSL from the drop down.
- Outgoing server (SMTP): 465
- Use the following type of encrypted connection: choose SSL from the drop down.
Once you have updated these settings, click on OK. You should close the window and you will be back on the setup page.
Click Next to test the settings.
Once the test completes, click on Finish to complete the set up.
Congratulations! You’ve just set up Outlook with your new email address. Try sending yourself a test message to make sure you can send and receive.
Updating an existing account
To update your email account, first you will need to access the account settings. You will need the click on File in the upper left hand side.
You should see a block with Account settings. Click on this the click on Account Settings… in the drop down menu.
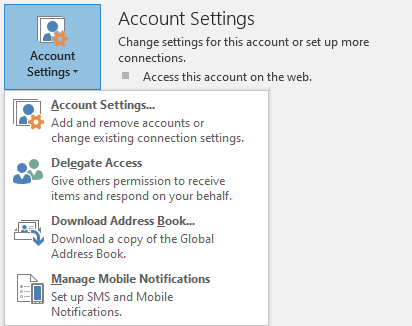
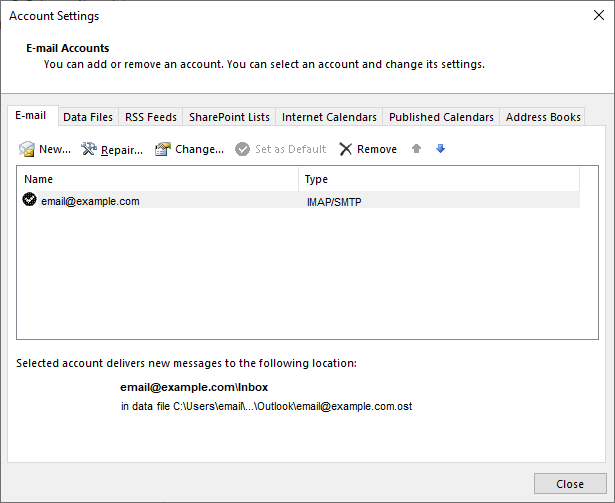
You should now be on the Account Settings screen.
You now need to click on the email in question to ensure that it is selected and then click on Repair, just above it.
On older versions, you should now see a screen that looks like this:
Note: If you are not seeing this screen, you have an newer version of office. Please follow the guide found here.
Make sure that you select Manual Setup and the click on Next.
From here the process is identical to the New Account process.
If you have any further questions, please be sure to reach out to our support staff by using our chat service in your client area or by submitting a ticket.
One reply on “Web Based Emails On Outlook (older versions)”
[…] Note: If you are not seeing this screen, you have an older version of office. Please follow the guide found here. […]