
Overview
One of the most useful properties of domains is the use of subdomains. This allows you to use your domain for several different services, while keeping each separate from the others. Here is a guide to creating and using subdomains with cPanel.
Subdomains
A subdomain uses a prefix in conjunction with the domain name. For example, if your domain is example.com, you can create the subdomain blog.example.com and host your blog there. This way you can have two, separate sites, sharing the same domain name.
Or, if you have several users on your domain, you can create a subdomain for each user. For example, if you were a church, you could create a subdomain for each pastor and allow them to each have their own blog or website, all of which would tie in with your domain. For example, if your domain was example.church, you could have the following websites, all independent of each other.
- example.church
- pastorbob.example.church
- pastordan.example.church
And they are not only for websites. There is no end to the amount of web based services that you can use subdomains for, from message boards and forums to custom built apps.
Create a Subdomain
In order to manage subdomains on your account, you first need to log into your cPanel.
If you do not know how to access your cPanel, you can find out here.
Once logged in, you will want to navigate to the Subdomains app in the Domains section.

Once you access your Subdomain app, you will see where you can add subdomains, as well as a list of your current subdomains.
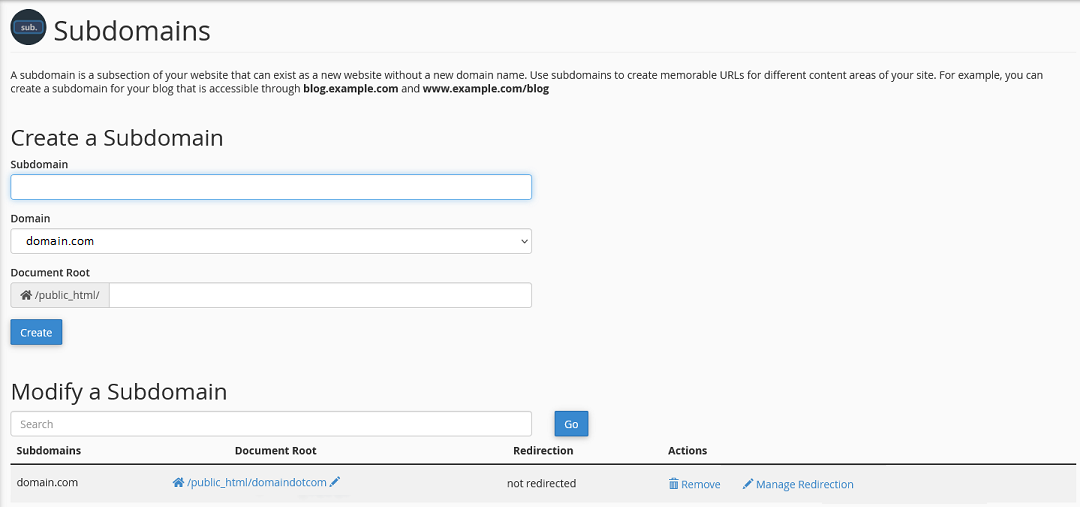
At the top of this page, you will see the fields used to create an new subdomain.
To create a subdomain, you only need to enter the prefix in the Subdomain field, and then select the domain from the Domain drop down.
Once you select the domain, the Document Root field will auto populate, but you can enter a different folder here if you like.
- Subdomain
- this is the prefix for your new subdomain
- for example, in the subdomain blog.example.com, the prefix is blog
- once you click on any of the other two fields, they will both auto-populate
- Domain
- select the root domain from the drop down list
- your primary domain will be selected by default
- if you have any Addon domains set up, you can choose one of those as well
- Document Root
- this is the folder where the website files will be stored
- it will auto-populate as a sub-directory of the root domain’s document root, named the prefix entered in the Subdomain field
When you create a subdomain in your cPanel, the system will create a sub-directory in your public_html (Document Root) directory. This folder will be named the full subdomain by default, but you can set this when setting up your subdomain.
Once satisfied with your entries, hit the Create button. This will create the web folder for you new subdomain, as well as the dns entries required.
If you use a third party for your DNS, you will need to add an A record for the subdomain with them. You can go to your Zone Editor to see what this record needs to be.
Modify a Subdomain
Here you will see a list of all your current subdomains.
- Subdomain
- this is the name of the subdomain
- Document Root
- this is the folder the website files are stored in
- you can edit this path by clicking on the
 icon
icon
- Redirection
- this shows where the subdomain is being redirected to , if any
- Actions
- Remove – this will delete the subdomain
- Manage Redirection – this will allow you to update the subdomain redirect
If you have any further questions, please be sure to reach out to our support staff by using our chat service in your client area or by submitting a ticket.
2 replies on “Managing Subdomains in cPanel”
[…] Before you can create a staging site, you will need to create a subdomain. You can find a guide on creating a subdomain here. […]
[…] you are planing on installing WordPress in a Subdomain or Addon domain, you will need to create them […]