
How can I update my WordPress site without affecting my live site?
If you have created a WordPress site for you church or business, and need to make big changes to it, you may worry that you could damage your existing site. Or, it may be that you do not want your site to be down why you build the new site. Then you will want to set up a staging site. Here is a guide on how.
What is a Staging Site?
A staging site is a website that is not live (internet users will not be able to visit) that you can use to update your existing website. This allows you to edit, upgrade or create an entirely new site, without affecting your current website.
Staging sites are used extensively in the professional web builder space, but, thanks to Softaculous, so can you.
While this feature is available for many of the Softaculous scripts, we will look at the WordPress site, as it is the most popular.
How do I create a Staging Site?
First, you will need a WordPress site that is being managed by Softaculous. Check out this guide for information on creating a new WordPress site or adding an existing one to your cPanel Softaculous.
Now, you will need to log into your cPanel.
If you do not know how to access your cPanel, you can find out here.
Before you can create a staging site, you will need to create a subdomain. You can find a guide on creating a subdomain here.

After you have your subdomain created, go back to the home page of your cPanel and scroll down to the Software section. You now have two options to proceed.
WordPress Manager by Softaculous
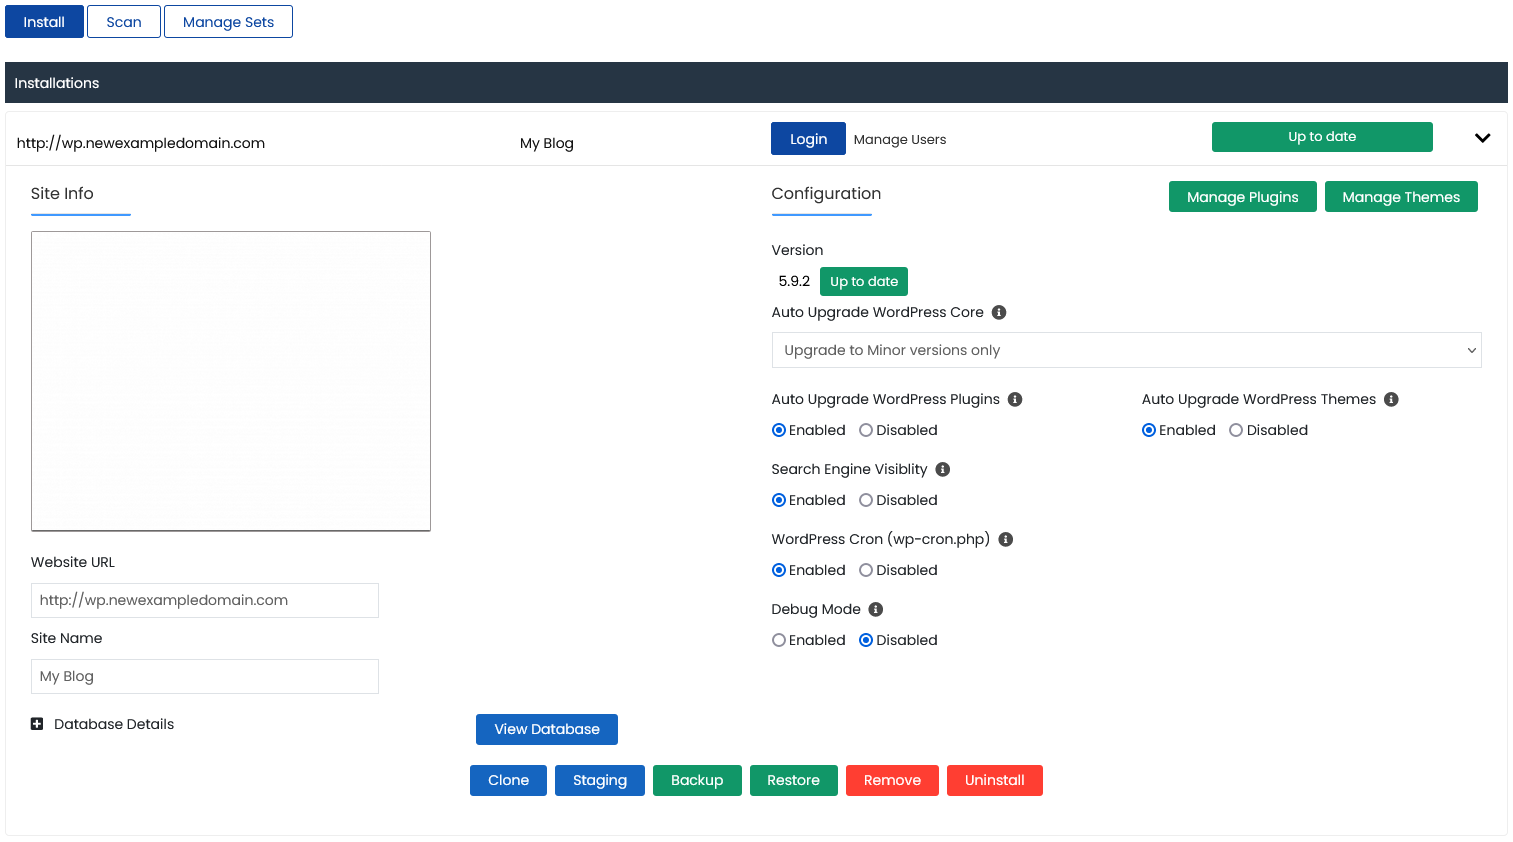
If you choose the WordPress Manager by Softaculous app, you will see several options for managing your WordPress site. For this guide, we will focus on the Staging button on the bottom. Once you click on that button, jump to this section.
Softaculous Apps Installer
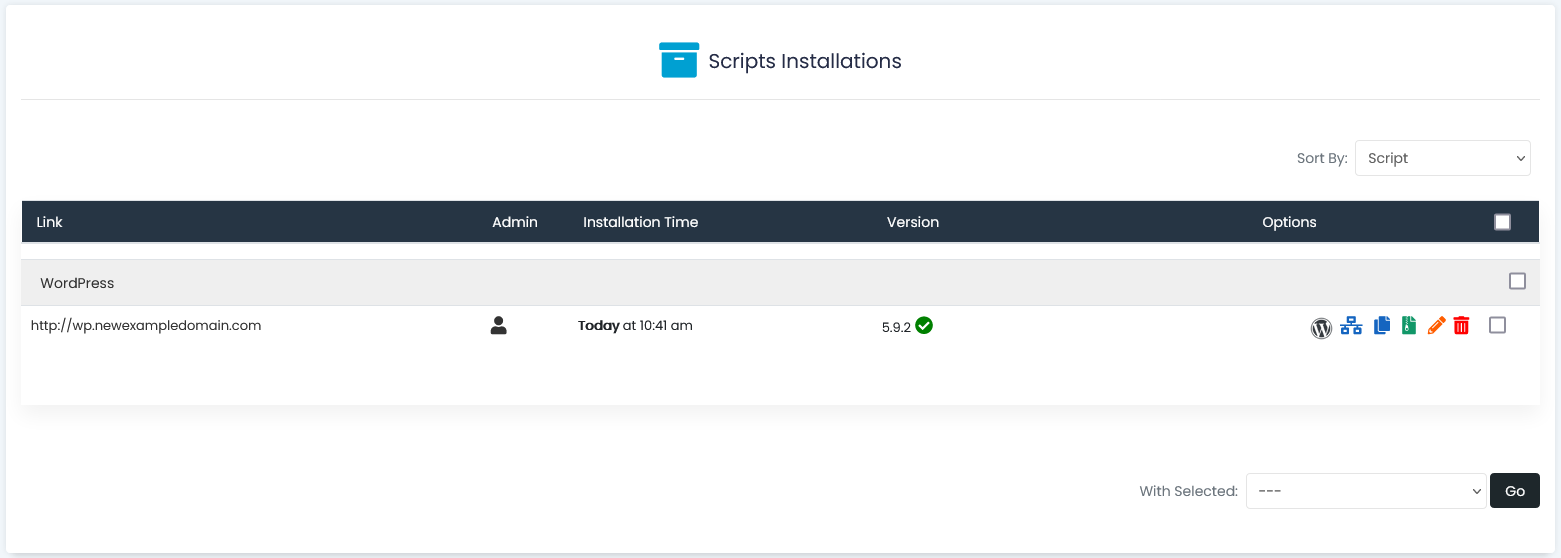
If you choose the Softaculous Apps Installer app, you will now see a list of all your Softaculous installs, divided by type.
Find your WordPress site and click on the Staging button.

Creating a staging site

No matter which method you used, you should now be at the Staging WordPress screen. Choose the subdomain that you just created and they click on Create Staging.

This will create a copy of your original website that you can access and update as wish, without affecting your original website.
While, technically, the staging site is live, you can password protect the site so it cannot be accessed by the public. This can be done in the WordPress admin section.
I have finished my new site, what now?
Once you have your new staging site ready to go live, you can use the Softaculous tool to merge it with the existing site.
Once you are back at your Softaculous WordPress sites, you will see that your staging site has an additional button. This is the Merge icon.


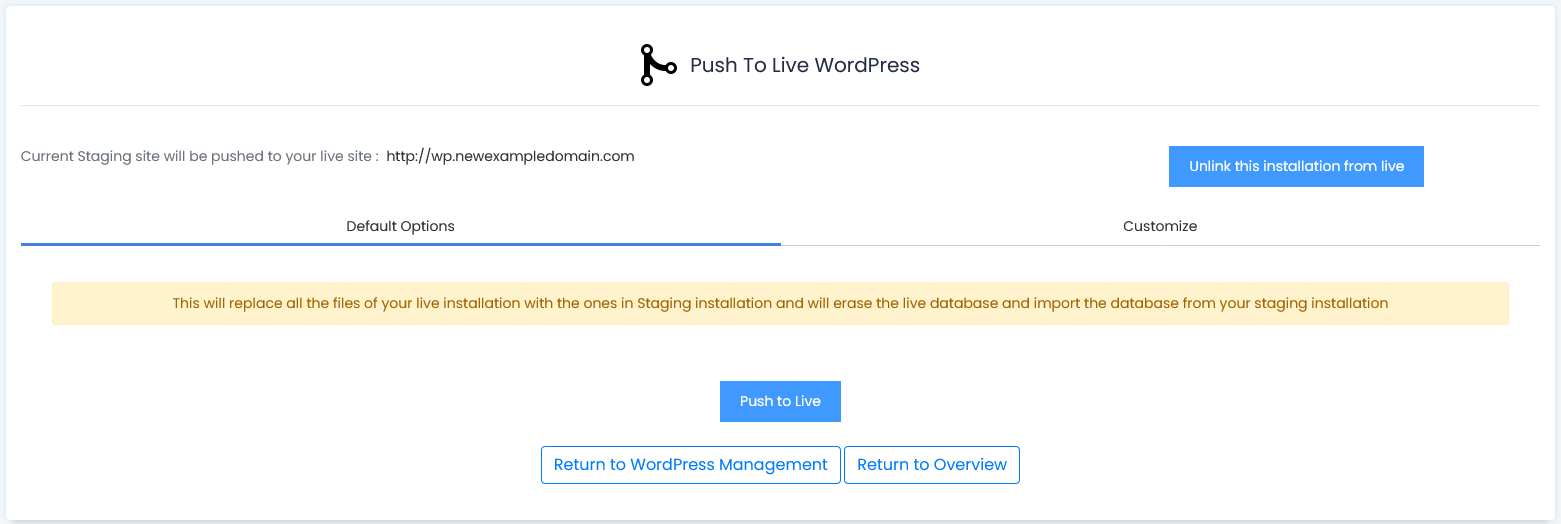
If you use the WordPress Manager by Softaculous app instead, you will see the Push to Live button.
Now, you have a few options on how to proceed, as well as two tabs.
Default Options
Here you will have the option to Unlock this installation from live or Push to live.
- Unlock this installation from live
- This will remove the sites status as a staging site and unlock it from the original site, basically making it its own site
- Push to Live
- This will replace the files of your original website with the files of your staging site, merging them into one
- Your current site will be deleted at this time and the staging site will now be the main site
- This operation is not reversible, so be certain that you are ready to proceed.
Customize
Here, you can choose to merge only parts of the staging site to the existing site, included the site files or parts of the database. This option should be used by advanced users only.
Once you are ready, Click Push to Live to merge your staging site.
Congratulations!! You just merged you staging site.
What happens to my staging site now?
Once you push your staging site to live, it is not deleted. You can continue to use your staging site to add updates to your live site and then push them to your live site when you are ready.
If you no longer need your staging site, you can delete it in the WordPress Manager.
If you have any further questions, please be sure to reach out to our support staff by using our chat service in your client area or by submitting a ticket.
3 replies on “WordPress Staging Sites”
[…] the cPanel without needing the WordPress password, as well as the ability to back up your site, create staging sites for updates and even clone your […]
[…] a staging site (see here for more […]
[…] WordPress Staging Sites […]