
Overview
One method of uploading files to your cPanel server is by using an SSH (secure shell) connection. While SSH is a more powerful tool for file transfer, this method is for more advanced users. Here is how you can connect with SSH.
Before you start
SSH Enabled
Before you can connect to our servers with SSH, you will first need to have it enabled for your account. To do this, you will need to contact support and request that SSH be enabled with a support ticket. You can find information on submitting a ticket here.
Shell client
You will also need a shell client in order to connect to the server.
If you are using a Mac or Linux machine, both of these have a shell client built in. You may need to check with the respective support pages find how to use these apps.
If you are using a Windows machine, you will need to either use the Windows PowerShell to connect, or download and install a shell client, such as Windows Terminal or PuTTY.
Private/Public Key Pair
You will need to create a Private/Public key pair from your shell and and upload the public key to your cPanel. We will have a guide for this below.
Create Private/Public Key Pair
The first step is to create a private/public key pair in your shell. While this process may vary slightly depending on what shell you use, this guide should work on most.
Shell
- Log into your shell of choice.
- Change to your .ssh directory
cd ~/.ssh- You may need to create this folder if it does not exist.
-
mkdir ~/.ssh
- Run the ssh keygen command
-
ssh-keygen –t rsa
-
- You should see the following
Generating public/private rsa key pair.
Create the key and passphrase

Enter file in which to save the key (/home/user/.ssh/id_rsa):- name the key (you can hit enter if you want this to be your default key, it will be named id_rsa)
Enter passphrase (empty for no passphrase):- enter a passphrase (you can hit enter if you do not wish to set a passphrase, but it is recommended to have one)
Enter same passphrase again:- confirm you passphrase
- You should now see the confirmation that the keys were set up
Your identification has been saved in /home/sshguy/.ssh/id_rsa.Your public key has been saved in /home/sshguy/.ssh/id_rsa.pub.
- To confirm the keys were created, you can list the .ssh folder.
ls ~/.ssh- You should see the private key (
key) and the public key (key.pub)
Uploading your Public Key
Retrieve your public key
First, you will need to log into your shell to retrieve your key.
- Log into your shell.
- Run the cat command on your public key to view it.
cat ~/.ssh/key.pub.
- Copy the public key to your clipboard.
Uploading your key to cPanel
Next, you want to log into your cPanel to upload the key there.
If you do not know how to access your cPanel, you can find out here.
Go to the Security section and click on the SSH Access app.

Click on Manage SSH Keys to get to the main SSH Access page. Here you will see any keys already uploaded you your cPanel, as well as options to Generate a New Key and Import Key. Click on Import Key.
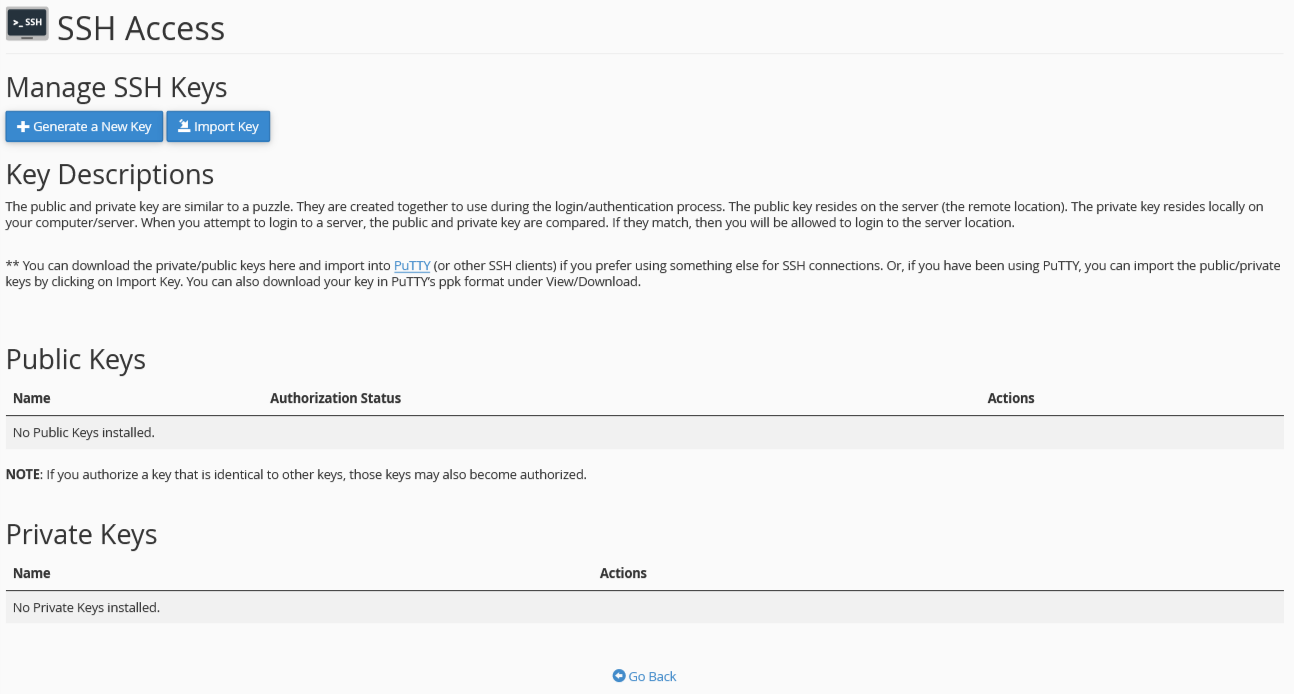
You will now be at the Import SSH Key page.
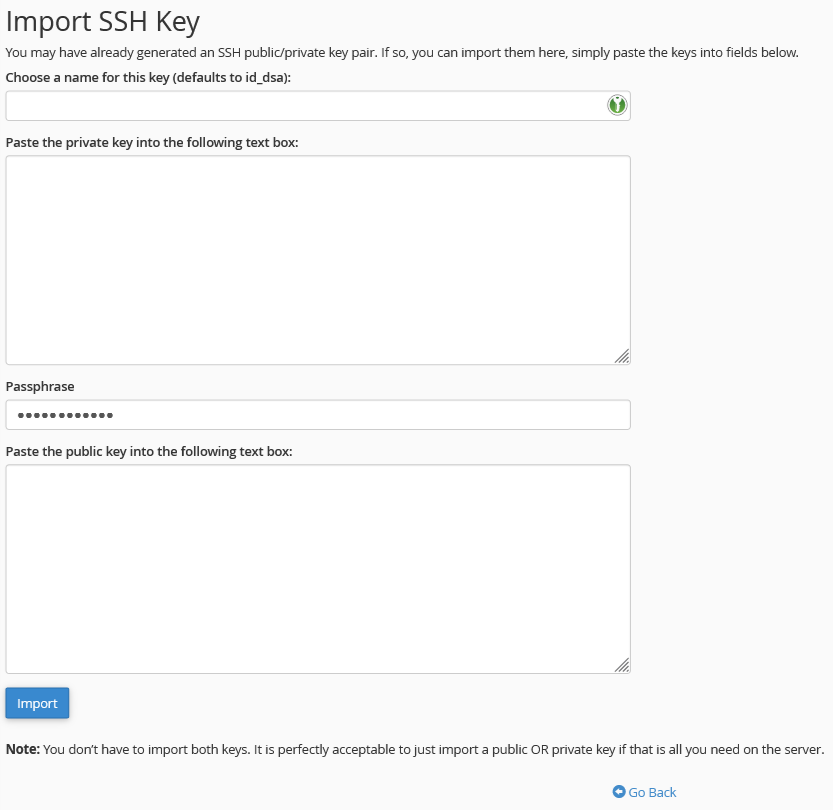
- Choose a Name for this key
- enter a name for this key (does not need to be the same as the name entered in shell).
- Private Key
- leave this blank (you Do Not want to copy your private key from your shell, it should remain private and secure at all times).
- Passphrase
- enter the password that you entered when creating the key pair, leave blank if you did not enter a passphrase.
- Public key
- paste your public key here .
Click Import once finished to upload the public key.
Authorizing your key
Once uploaded, you need to authorize the key in cPanel.
If you just uploaded the key, click Go Back at the bottom of the screen. Otherwise, get to the SSH Access page. You can find how above.
You should see your public keys listed.

- Click Manage to the right of the key you wish to authorize.
- Click on Authorize .
- Click on “Go Back” to return to the Key List.
- Please note:
- You should always delete old keys when no longer needed.
Connect to server
You can now connect to your cPanel server using the ssh command.
ssh -i [path to key]/[key name] [username]@[hostname]
For example:
ssh –i ~/.ssh/keyname.pub user@domain.com –p1022
- Please note:
- For security reasons, our servers use port 1022 for ssh.
- If you used the default key name (ida_rsa), you can omit the
-i ~/.ssh/keyname.pubwhen connecting.
If you have any further questions, please be sure to reach out to our support staff by using our chat service in your client area or by submitting a ticket.